NextGen Knowledge Center

Print or Export Batch Appointment Reminder Letters

Patients with appointments qualify for letters based on the Days in advance of scheduled date to print reminders setting in Practice Preferences > Appt Scheduling.

For example, if a patient's appointment is scheduled for 06/01/2016 and Practice Preferences is set to 10 days, the patient qualifies and is added to a letter queue on 05/22/2016. Other patients may qualify and be added to the letter queue on a daily basis. Because of this, appointment reminder letters should be monitored and printed/exported regularly.

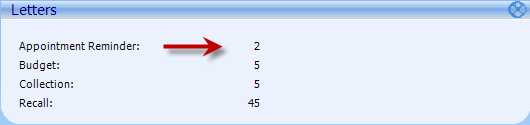
The number of appointment reminder letters in the queue can be monitored from the Letters section on the Advisor window in NextGen® Enterprise PM.

  1. From the File menu, select Print Forms, then Letters, and then Appt Reminders.
    The Appointment Reminders window opens.
  2. Enter Search Criteria as follows:
    • Include appointments n days from today: The end of the date range to be printed equals (Today's Date + "Include" days). For example, if today is the 3rd, and this option is set to 21, the last appointment date included will be the 24th. This value can be from 1 to 30 and must be greater than the "Exclude" days. The default is 5.
    • Exclude appointments [n] days from today: The start of the date range to be printed equals (Today's Date + "Exclude" days). For example, if today is the 3rd, and this option is set to 5, the first appointment date included will be the 8th. This value can be from 0 to 10 and must be lower than the "Include" days. The default is 1.
    • Resource: Select a specific resource to include appointments for that resource only. Or leave blank to include appointments for all resources.
    • Location: Select one or more locations to include appointments for the location(s) only. Or leave blank to include appointments for all locations.
    • Event: Select a specific event to include appointments for that event only. Or leave blank to include appointments for all events.
    • Exclude Expired: Select this check box to exclude appointments for patients that have been flagged as expired on the Patient Information window. This check box is selected by default.
  3. Select Find.
    All appointments that match the search criteria entered display in the Appointments section at the bottom of the window.

    All appointments are selected by default.

  4. Deselect appointments that should not print a letter, if applicable.
  5. To upload the letter export file to NextGen® EDI for processing (printing and mailing), select the Upload Export File To NextGen EDI check box.
  6. Do one of the following:
    • To print the selected appointment reminder letters, select Print.
      The following prompt displays: Did the letter(s) print correctly?

    • To create an ASCII export file to be sent to a third-party vendor for processing (printing and mailing), select Export.
      The following prompt displays: Did the letter(s) export correctly?

  7. If the letters exported/printed correctly, select Yes.
  8. To update each patient's chart with the date/time the letter was generated, select the Update Dates button.
  9. Use the following table as reference for buttons that are available at the bottom of the:

Example

Sample Appointment Reminder Letter (Printed)

Sample Appointment Reminder Letter (Exported)