Display All Sections by Clearing the Filter
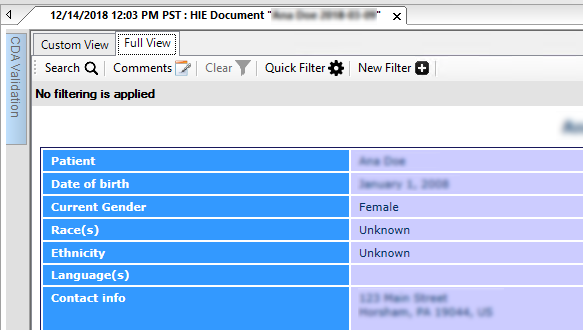
To restore display of all sections of the CDA in Full View, select
Clear Filter
.
A message appears above the document, stating that no filter is applied.
Recommendations
Explore
Display All Sections by Clearing the Filter
NextGen® Enterprise EHR Help
Hide Unwanted Sections with the Quick Filter
The Quick Filter enables you to change which information sections are currently displayed for a CDA open in Full View. Select Quick Filter Gear. The CDA Section Filter window appears. CDA Section Filter In the Sections list, select or clear the check boxes to specify which sections should be displayed for the CDA. To reorder the sections, select a section and then move it with the Up (up), Down (down), Move to Start (move to start), or Move to End (move to end) buttons. Select Apply. A message appears at the top of the document, stating that the Quick Filter is being used. Quick Filter Message Parent topic: Filtering the Full View
NextGen® Enterprise EHR Help
Create User Filters
A user filter is a filter that you create that becomes available to you whenever you open a CDA in Full View. Do one of the following: To create a new filter based on the filter settings that are currently applied to the open CDA, select Quick Filter Gear, then Save As User Filter. To create a completely new filter that is unrelated to the current quick filter settings, select New Filter New Filter. After either of the above actions, the CDA Section Filter window appears as follows: CDA Section Filter Optionally, select Clear Filter to deselect all the sections in the Sections list. Select and order the information sections as described in Hide Unwanted Sections with the Quick Filter. In the Name box, enter a name for the filter. If you want the new filter to be used automatically when you open CDAs, select My Default Filter. Because CDAs can include sections with unrecognized types of information, select or clear Display Unknown Sections When Viewing CDA. Select Save. A button for the
NextGen® Enterprise EHR Help
Select a User Filter
Once you have created user filters, you can apply any filter by clicking the corresponding button along the top edge of the CDA document. The default filter appears first. The remaining filters appear in alphabetical order. If there are too many filters to fit in the button bar, you can access additional filters by clicking the Down Arrow (down arrow) icon at the right end of the button bar. Location of Down Arrow Icon Once you have selected a filter, a message appears just below the button bar, stating "This document is being displayed using filter: <filter name>". Parent topic: Filtering the Full View
NextGen® Enterprise EHR Help
Display All Sections by Clearing the Filter
To restore display of all sections of the CDA in Full View, select Clear Filter Clear Filter. A message appears above the document, stating that no filter is applied. No Filter Applied Message Parent topic: Filtering the Full View
NextGen® Enterprise EHR Help
Filtering the Full View
You can create filters for viewing Consolidated Clinical Document Architecture (C-CDA) documents. Filters have two advantages: Within a loaded document, it is easier for you to find information by filtering out unwanted clinical categories. A filter can make long C-CDA documents load faster if you have saved that filter as your default filter. Hide Unwanted Sections with the Quick Filter How to use the Quick Filter to hide unwanted sections in Full View. Create User Filters How to create user filters for use in Full View. Select a User Filter How to apply an existing user filter in Full View. Display All Sections by Clearing the Filter How to clear the filter so that Full View displays all sections. Parent topic: Viewing CDA Documents in Full View
NextGen® Enterprise EHR Help
Hide Unwanted Sections with the Quick Filter
The Quick Filter enables you to change which information sections are currently displayed for a CDA open in Full View. Select Quick FilterGear. The CDA Section Filter window appears. CDA Section Filter In the Sections list, select or clear the check boxes to specify which sections should be displayed for the CDA. To reorder the sections, select a section and then move it with the Up (up), Down (down), Move to Start (move to start), or Move to End (move to end) buttons. Select Apply. A message appears at the top of the document, stating that the Quick Filter is being used. Quick Filter Message Parent topic: Filtering the Full View
 .
.