You can use the command-line installer to install
Mirth® Connect on multiple environments.
Attention: Some features that are available in the graphical installer are not available from the command-line installer. The missing features include the following:
- Entering and validating a license key
- Installing extensions
- Running the Mirth® Connect Server Manager
Note: You can use the command-line installer on macOS and non-headless Linux environments by running the .sh file (or on Windows by running the .exe file) in console mode using the -c option. However, NextGen recommends using the graphical installer on those environments.
- Access the Mirth® Connect downloads from your Success Community account.
- From the Success Community account, access the Mirth® Connect Download Central knowledge page. Refer to the topic Install Mirth Connect Using the Mirth Connect Installer to view the instructions on accessing the installer files.
- To make the installer file executable use the following command:
chmod +x mirthconnect-x.x.x.bxxxx-unix.sh
- You can run the installer in console mode using one of the -c options shown below. Both options prompt for installation preferences such as directory, license key, and available Mirth® Connect Extensions to download and install. The varfile option lets you predefine default values for these prompts. Refer to the topic Example Preference Files for Console and Quiet Mode for more details. In Windows, click the Start button, enter Run, and type the below command to execute in console mode. This requires full paths to the exe file as well as the varfile.
sudo ./mirthconnect-x.x.x.
bxxxx-unix.sh -
c sudo ./mirthconnect-x.x.x.bxxx-unix.sh -
c -varfile response.varfile
- Enter your Linux user password, if prompted.
The installer starts and prompts you to continue or cancel.
- Type o or select
Enter to continue.
The license agreement appears.
- Enter
1 to accept.
- Select Enter to advance through the text until you’ve reached the end of the agreement.
You are prompted to accept the license agreement.
- The installer shares a link to review the User Guide, a few guidelines to look at, and a link to the Success Community to review the Release Notes for the current version you are installing. You will be prompted to enter the directory location where Mirth® Connect is to be installed if it is a new installation. Enter the absolute path of a directory or press Enter to accept the displayed default value. In Windows, if the installation location is not in the default location (example: Program Files), you are asked about permission changes.
- Select Enter to continue.
You are prompted to enter the folder where to install
Mirth® Connect.
- The installer displays information about license keys.
- Enter a license key and select
Enter to continue.
The installer displayes list of extensions supported by your license key.
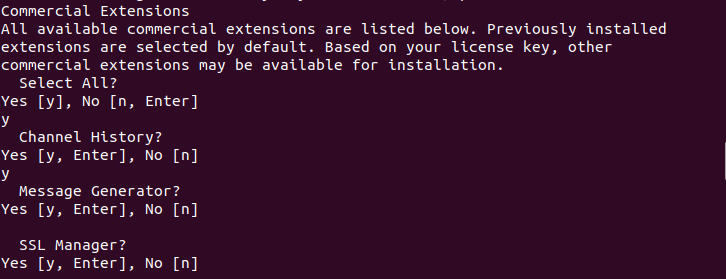
- Select the extensions and select Enter to continue.
The selected extensions are downloaded, and the installer displayes list of components that can be installed.
- Follow the on-screen instructions to enter a comma-separated list of values indicating which components to install or select Enter to install all components.
You are prompted to select additional extensions to install.

- Enter the absolute path of a folder and file or press
Enter to accept the displayed default value.
You are asked whether to create symlinks.
- Type
y or select Enter to create them. Otherwise, type n to skip creating symlinks.
Note: If you choose to create symlinks, you will be prompted to select the folder to create them in. Enter the absolute path to the folder or select Enter to accept the default value.
The installer displays information about network ports which includes a link to the appropriate page in the user guide.
- Select Enter to continue.
The installer displays a link to the “Server Tab” section of the user guide.
- Select Enter to continue.
You are prompted to enter the Web Start Port that the Mirth® Connect Server should use.
- Enter a numeric value or select
Enter to accept the default value.
You are prompted for the Administrator Port.
- Enter a numeric value or select
Enter to accept the default value.
The installer displays a link the “Password Requirements” section of the user guide.
- Select Enter to continue.
You are prompted to configure the password requirements.
- For each, enter a numeric value or select Enter to accept the default.
The installer displays a link to the “Data Paths” section of the user guide.
- Select Enter to continue.
The install displays a link to the “Logs” section of the user guide.
- Select Enter to continue.
You are prompted to enter the location to store application data.
- Enter the absolute path to a folder to continue.
(For example: /opt/mirthconnect/appdata)
You are prompted to enter the location to store logs.
- Enter the absolute path to a folder to continue.
(For example: /opt/mirthconnect/logs)
The installer gives you the option to install the Mirth® Connect Service.
- Type y or select Enter to install the Mirth® Connect Service, or type n to skip installation.
The installer downloads and extracts all necessary files.
If you installed the Mirth® Connect Server Manager, you are prompted to run it.
- Because you are using a command line interface and the Server Manager is a GUI interface, you can skip this step by typing n.
You are given the option to view the README file.
- Type
y or select Enter to view it. Type n to skip viewing it.
The installation process is now complete.
If you chose to install the Mirth® Connect Service, it begins running.
